
Export Primavera P6 Data Into Excel and Format
- Dp

- Apr 29, 2018
- 2 min read
Updated: May 17, 2018
We all know how to export the Schedules prepared in the Primavera tool into a spreadsheet format, if not view the tutorial just below.
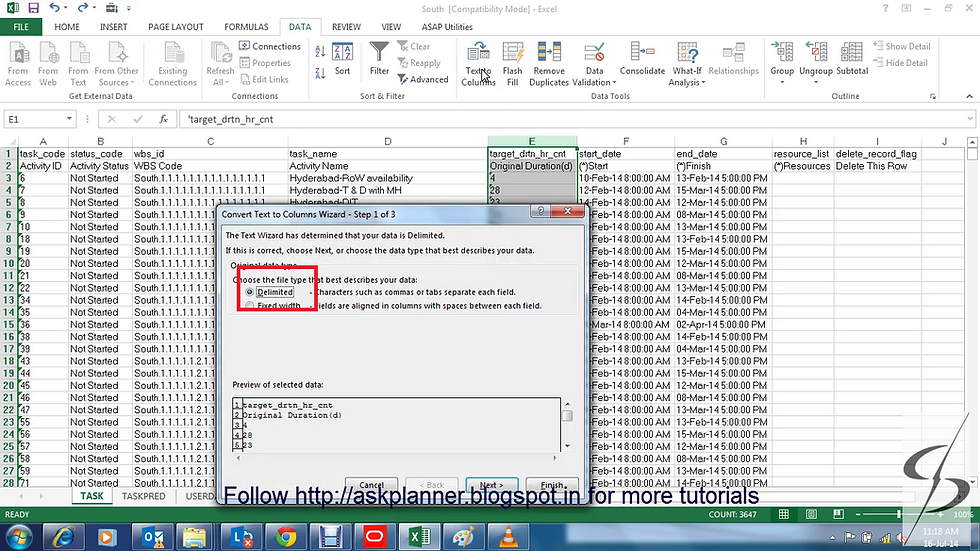
After Exporting, sometimes it needs to be modified further so as to use it for other reporting purposes, updating of the data in excel. But unfortunately the P6 Exports the data as TEXT format and not into the exact existing format. and Simple "Format Cell" Function in Excel wont solve our problem and this needs a small exercise to make the data to handle simpler. A Sample export of the schedule in P6 into an Excel format has been shown below and the tip will be explained further to that.

If you look at the "Duration" in the Column E of the spreadsheet, you will notice apostrophe (') in front of the duration fields. Similarly you will find it in the date fields even

All the data fields will have this apostrophe (') symbol as the data has been exported in the text format.

Now, let us see the tip/trick to format these fields into the desired format.
Step 1:
Select the column E which needs to be converted to the number format. and click on the "Data" Field in the menu bar.

Step 2:
Now select the "Text to Columns" field in the same menu ribbon. Then you will be able to see the "covert text to columns wizard will be popped up.

In the "Convert text to Columns Wizard -Step 1 of 3, select the "Delimited" option and click "Next"
In the "Convert text to Columns Wizard -Step 2 of 3, select Tab Check box under the delimited group. And in the "text Qualifier" drop down box, select the apostrophe ' and then click on "Next".

In the "Convert text to Columns Wizard -Step 3 of 3, Do not change any of the default settings and Click "Finish" Button and now you will see the data in the Text format in the Column E Converting into Number Format.

Now for the Date Fields,follow the steps as explained above and after removing the Apostrophe symbol as above. In the Format Cell" Dialog, select the "numbers" tab and under category ,select "Custom" and under Type list ,select "dd-mmm-yy" and click ok.

And now the Final cleaned up Spreadsheet will be visible as below and it can be shared and updated with other planners, which would make your updating simpler.

Hope this tip helps you a lot, and any queries can be posted here. A video of this exercise has been posted below for further better understanding.
If you liked this tutorial, share it with your friends. And also you can follow us on Youtube, Twitter and Facebook. We would love to hear from you, Please do comment, suggest or compliment our work and we shall make it better for you.
You can write us at dptutorials15@gmail.com


Comments